Table of Contents
ToggleHigh ceilings can feel like winning the architectural lottery, until you’re staring at all that empty vertical space wondering how to fill it. Those extra feet of volume offer dramatic possibilities, but they also demand thoughtful design choices. Leave them bare, and the room feels cold and unfinished. Get it right, and you’ve got a space that’s both grand and inviting. Whether you’re working with vaulted ceilings, two-story great rooms, or 10-foot-plus standards, these strategies will help turn that vertical real estate into a design asset that actually works.
Key Takeaways
- High ceiling living room ideas work best when vertical space is intentionally anchored with statement lighting, tall furniture, and architectural details rather than left bare and empty.
- Use large-scale chandeliers, oversized art (4–6 feet wide), and floor-to-ceiling drapes to fill vertical space and create visual balance without cluttering the room.
- Paint ceilings in darker, warmer shades or apply vertical wall patterns to add intimacy and prevent high ceiling rooms from feeling cold and cavernous.
- Install tall bookcases, floating shelves, and wall-mounted fixtures at staggered heights to draw the eye upward and maximize unused wall space in high ceiling living rooms.
- Layer multiple lighting types—statement fixtures, recessed cans, and uplighting—to illuminate the upper third of the room and reduce harsh shadows that emphasize emptiness.
- Exposed or faux wood beams and crown molding (5–8 inches) add architectural interest and break up expansive ceiling planes while improving the room’s overall design impact.
Why High Ceilings Are a Design Asset Worth Celebrating
High ceilings, typically anything above the standard 8- to 9-foot height, bring architectural presence that’s hard to replicate. They flood rooms with natural light, amplify spatial volume, and create sightlines that make even modest square footage feel expansive.
From a practical standpoint, they also improve air circulation and can reduce the boxed-in feeling common in standard-height rooms. But the real payoff is design flexibility. You can layer lighting at multiple heights, hang oversized art without overwhelming the space, and use tall furniture without worrying about visual clutter.
The challenge? High ceilings can also feel cavernous or cold if not properly anchored. Sound echoes more, heat rises (increasing HVAC costs), and poorly chosen furnishings can look lost. The goal is to harness the height while maintaining a sense of human scale and warmth.
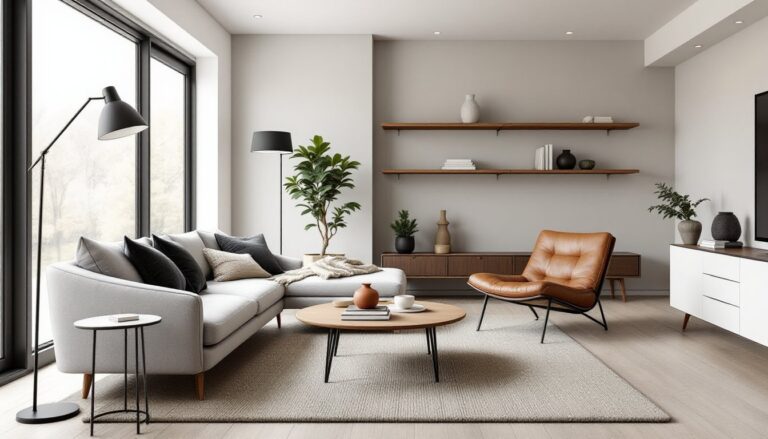
Draw the Eye Upward with Statement Lighting
Lighting is the single most effective tool for filling vertical space. In high-ceiling rooms, statement lighting fixtures serve double duty, they illuminate and they anchor the upper third of the room.
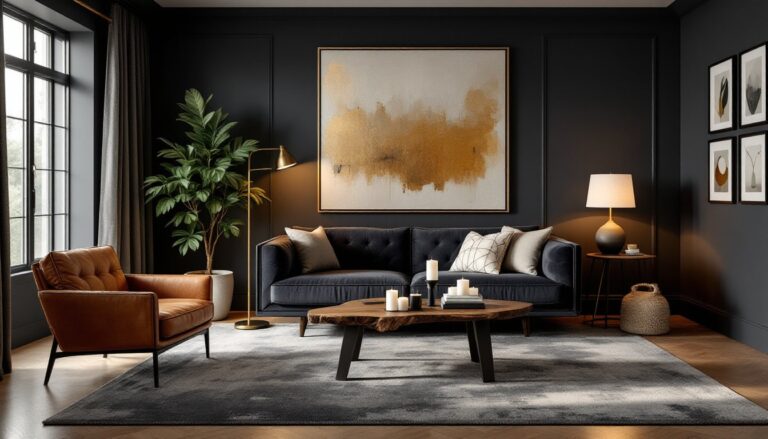
Chandeliers and Pendants: A large-scale chandelier or multi-tier pendant draws the eye upward and establishes a focal point. For rooms with 10- to 12-foot ceilings, hang the fixture so the bottom sits 7 to 7.5 feet above the floor, high enough to walk under comfortably, low enough to feel visually connected to the living space. For vaulted or two-story rooms, consider fixtures that extend down 3 to 4 feet from the ceiling.
Recessed and Track Lighting: Supplement statement pieces with recessed cans or track lighting to wash the walls and reduce shadows. Space recessed lights 4 to 6 feet apart and aim for a mix of ambient, task, and accent lighting layers.
Uplighting: Wall sconces or floor lamps with upward-facing bulbs can graze the ceiling and highlight architectural details like beams or coffers. This technique adds warmth and prevents the ceiling from disappearing into darkness at night.
Safety note: If you’re installing new fixtures or adding wiring, follow NEC (National Electrical Code) requirements and consider hiring a licensed electrician, especially for heavy chandeliers that require reinforced junction boxes.
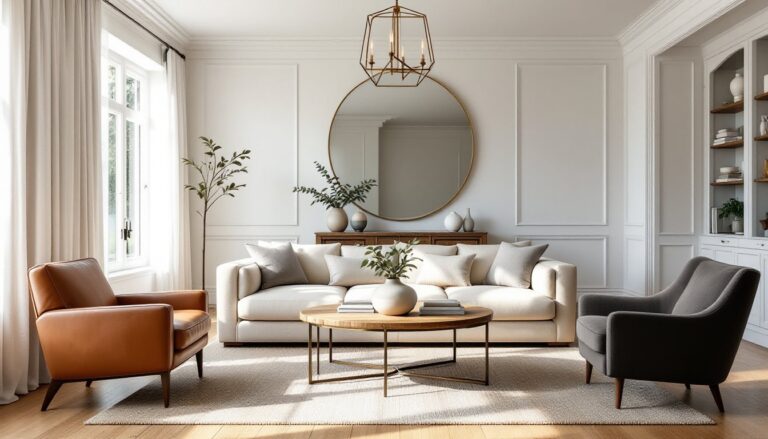
Create Visual Balance with Tall Furniture and Vertical Arrangements
Standard-height furniture can look marooned in a high-ceiling room. The solution is to scale up, not just in footprint, but in vertical presence.
Tall Bookcases and Shelving: Floor-to-ceiling bookcases, built-ins, or modular shelving units draw the eye upward and make use of wall space that would otherwise go wasted. If you’re building custom shelving, use 3/4-inch plywood or solid wood for shelves longer than 36 inches to prevent sagging. Anchor tall units to wall studs (typically 16 inches on center) with L-brackets or French cleats.
Oversized Armoires and Cabinets: Tall storage pieces, think armoires, hutches, or media cabinets, add vertical mass without cluttering floor space. Look for units 7 to 8 feet tall to bridge the gap between standard furniture height and the ceiling.
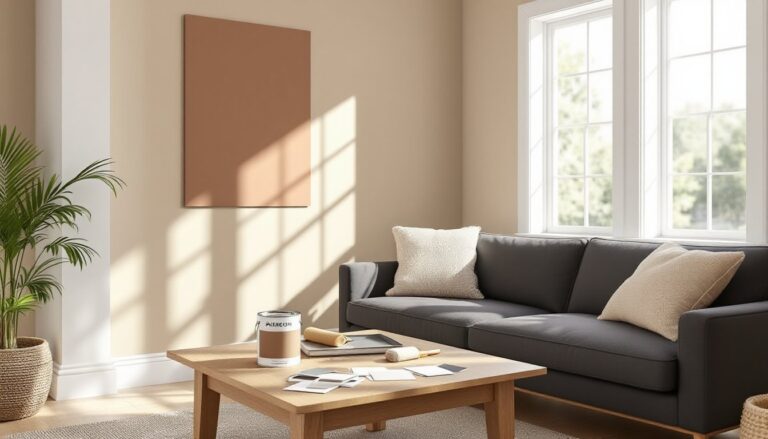
Vertical Art Arrangements: Instead of hanging a single piece at eye level (about 57 to 60 inches from the floor), create a gallery wall that extends upward. Start at the traditional height and build vertically, using frames of varying sizes to fill the upper wall.
Curtains and Drapes: Hang curtain rods as close to the ceiling as possible, not at the window frame. Floor-to-ceiling drapes elongate the room and create an unbroken vertical line. Use drapery clips or rings for easy adjustment, and choose fabrics that pool slightly on the floor for a finished look.
Use Paint and Wallpaper to Define Zones and Add Warmth
Paint is one of the most cost-effective ways to manage high ceilings, and the color choices you make can either enhance or diminish the sense of height.
Accent the Ceiling: Painting the ceiling a shade darker than the walls (think warm grays, soft taupes, or even deep navy) visually lowers it and adds intimacy. This works especially well in rooms with 12-foot-plus ceilings that feel too tall. One gallon of ceiling paint typically covers 350 to 400 square feet, so measure carefully.
Two-Tone Walls: Consider a horizontal divide, paint or wallpaper the lower two-thirds of the wall in a deeper, richer hue, and keep the upper third and ceiling light. This grounds the room and prevents the walls from feeling like endless blank canvases. Use a laser level to mark a clean line: freehand divides rarely look professional.
Wallpaper with Vertical Patterns: Vertical stripes or linear motifs emphasize height, while bold, large-scale patterns add visual weight and warmth to living spaces. Stick with peel-and-stick options if you’re DIYing, they’re more forgiving than traditional paste-the-wall types.
Prep Is Everything: High walls mean scaffolding or an extension ladder, so plan accordingly. Use a 6- to 8-foot step ladder with a stabilizer bar for safety, and always work with a spotter if you’re reaching above 10 feet. Prime bare drywall with a PVA primer to ensure even paint adhesion, especially on textured or patched surfaces.
Maximize Wall Space with Oversized Art and Shelving
Blank walls in high-ceiling rooms scream for scale. Undersized art and décor get lost: oversized pieces command attention and fill the void.
Large-Scale Art: A single piece 4 to 6 feet wide (or taller) makes a stronger statement than a cluster of small frames. If you’re hanging heavy canvases or framed prints, use heavy-duty picture hangers rated for the weight, and anchor into studs whenever possible. For drywall-only mounting, use toggle bolts or molly bolts rated for at least 50 pounds.
Floating Shelves: Install floating shelves at staggered heights to break up the wall and add functional display space. Use 2-inch-thick shelves for a substantial look, and bracket them with hidden supports screwed into studs. Standard shelf depth is 10 to 12 inches: go deeper (up to 16 inches) if you’re displaying larger objects.
Statement Mirrors: Oversized mirrors (5 to 7 feet tall) reflect light and visually expand the room. Lean a large floor mirror against the wall for a casual look, or mount it securely with D-rings and wall anchors. Check the mirror’s weight before installation, some require two people and reinforced mounting.
Textile Wall Hangings: Tapestries, woven rugs, or fabric panels soften hard surfaces and add texture. Use a curtain rod or wooden dowel mounted to the wall, and hang the textile with clips or sewn loops. This approach works especially well in modern farmhouse settings where rustic textures are at home.
Add Architectural Interest with Exposed Beams and Molding
Structural and decorative elements can transform a tall, flat ceiling into a feature worth looking at. These upgrades range from DIY-friendly trim work to projects that require a carpenter.
Exposed Beams: Real or faux wood beams add rustic charm and break up expansive ceiling planes. Faux beams made from polyurethane or lightweight wood composites are easier to install than solid lumber, they’re hollow, weigh a fraction of real beams, and can be glued and screwed directly to ceiling joists. Space beams 3 to 4 feet apart for visual balance. If you’re adding real beams (such as reclaimed 6×6 or 8×8 timbers), consult a structural engineer to ensure ceiling joists can support the load. According to design galleries featured in Architectural Digest’s high ceiling living rooms, beams are a hallmark of high-impact ceiling design.
Crown Molding and Trim: Standard 3- to 4-inch crown molding can look puny on 10-foot-plus walls. Step up to 5- to 8-inch profiles for proper scale. Installation requires a compound miter saw for accurate angle cuts (crown molding typically sits at a 45-degree angle). If you’re working solo, use a miter saw stand with supports to handle longer lengths. Nail molding into ceiling joists and wall studs with a brad nailer (18-gauge brads work well), and fill nail holes with spackle before painting.
Coffered Ceilings: Coffered panels (recessed squares or rectangles framed with trim) add depth and old-world elegance. This is an advanced DIY project, it involves building a grid framework, installing trim or beams, and potentially adding recessed lighting. If your ceiling height allows (10 feet minimum after coffers are installed), the effect is dramatic. Check out examples from sources like Home Bunch for inspiration on coffered and tray ceiling layouts.
Permits and Pros: If you’re modifying ceiling structure, adding heavy beams, or running new electrical for recessed lighting, check local building codes. Most jurisdictions require permits for structural changes. When in doubt, hire a licensed contractor.
Conclusion
High ceilings offer design possibilities that standard-height rooms can’t match, but only if you treat that vertical space with intention. Layer your lighting, scale up your furnishings and art, and don’t shy away from architectural details that give the eye something to land on. With the right approach, those soaring walls become the room’s greatest strength.